Crystallography, the study of crystals is important
both in the study of minerals and chemistry. Each chemical
element and compound (a mineral is a compound, or an element) has a
specific shape to its crystals. These shapes can help in
identifying the mineral or chemical.
Crystals are sorted (classified) into six classes according to their
shape. Each class contains two types. Many crystals combine
different shapes.
While building models is usually not considered a science project by
itself, models are often useful as part of a project to help illustrate
and explain what you
have learned.
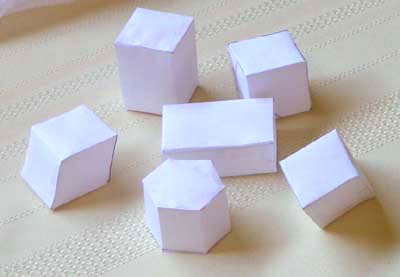
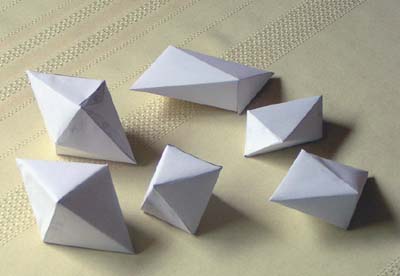
I have created a model of the simplest shape of each type.
Assembling these models will help you to appreciate and understand the
various shapes better than the two dimensional diagrams in the books.
Directions:
1. Click on Face Centered Crystal Shapes.
2. Use the "print" command on your browser, it should print the six
patterns, two on each page.
3. Click on Face Centered
Crystal Chart.
4. Use the "print" command on your browser, it
should print the chart.
5. Cut out the first crystal pattern on the
solid lines.
6. Lay the pattern on a flat surface with the printed side up.
7. Fold the model upward and crease along each dotted line, this will
put all the printing on the inside of the model.
8. Glue tab "A" to the INSIDE of edge "A".
9. Continue to glue each of the other edges in the same way.
10. Select the least attractive side of the model, and glue that side
to the
appropriate space on the chart.
11. Click on Body Centered Crystal Shapes.
12. Use the "print" command on your browser, it should print the six
patterns, two on each page.
13. Click on Body Centered
Crystal Chart.
14. Use the "print" command on your browser, it
should print the chart.
15. Cut out the first crystal pattern on the
solid lines.
16. Lay the pattern on a flat surface with the printed side up.
17. Fold the model upward and crease along each dotted line, this will
put all the printing on the inside of the model.
18. Glue tab "A" to the INSIDE of edge "A".
19. Continue to glue each of the other edges in the same way.
20. Select the least attractive side of the model, and glue it to the
appropriate space on the chart.